

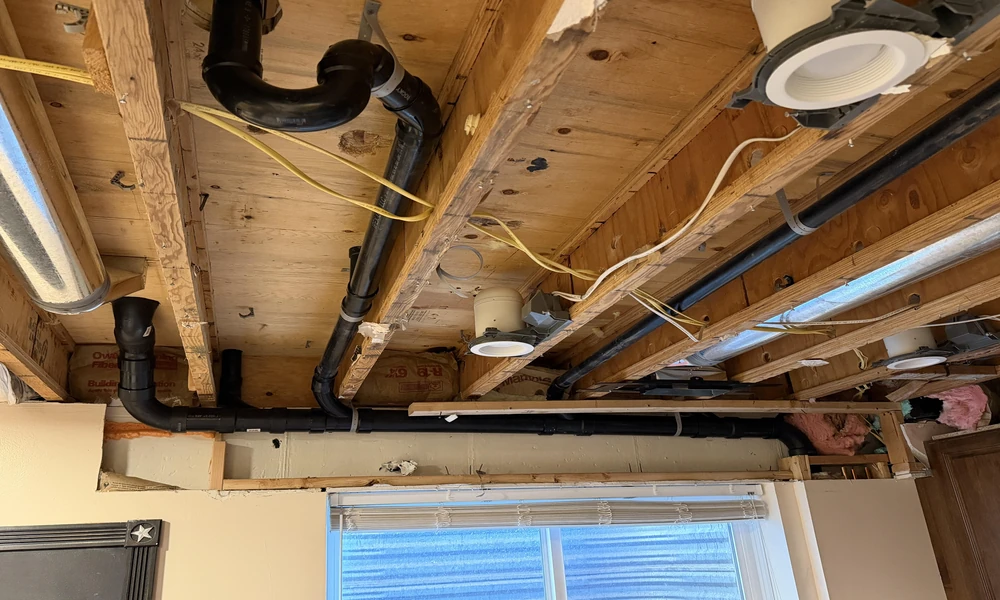
There is a short stretch in every build or remodel when the plumbing is fully exposed. The pipes have been run, the drains are set, and nothing has been hidden yet. Once insulation and drywall go in, every pipe in those walls becomes much harder and more expensive to reach. A fix that costs a few minutes now can mean cutting open finished tile later.
Most homeowners never step into their framed house with plumbing in mind. They check outlet locations and window sizes, and they assume the inspector will catch everything else. Texas inspections confirm that the work meets code. They don’t confirm that the layout suits how your household will actually use the house, or how the local water and weather will treat it.
That gap matters in this part of Texas. Water drawn from the Edwards and Trinity aquifers passes through limestone and arrives very hard. Summers push attic temperatures to extremes, and the February 2021 freeze showed how badly exposed lines can fail. Expansive clay soils move slabs over time. A house built here needs plumbing designed with those conditions in mind.
Families planning a new home or a major remodel around San Antonio, Bulverde, Spring Branch, Canyon Lake, New Braunfels, Schertz, Cibolo, or Selma can get that kind of local judgment from Bailey’s Plumbing Services. The family-owned team has spent more than 18 years on everything from full rough-ins in new construction to remodel plumbing, tank and tankless water heaters, and water softener installs. They offer free in-home estimates, so the best time to bring them in is while the studs are still bare and changes are cheap.
1. A Pressure Test That Actually Held
At the top-out stage, supply lines are pressurized and drain lines are filled or air-tested to prove there are no leaks. Ask whether the test was run and whether the gauge held steady for the required time. If you can, see the gauge yourself. A slow drop points to a weak fitting or a nicked line. Those problems are easy to find with open walls and hard to trace once drywall hides the evidence.
2. A Softener Loop With Somewhere to Drain
Hard water scales up water heaters, faucet cartridges, and dishwashers faster than most people expect. Even if a softener isn’t in the budget yet, a softener loop should be. This is a pair of stubbed pipes, usually in the garage, where the unit can be connected later with a bypass valve. The spot also needs a nearby drain for the regeneration cycle and an electrical outlet. Hose bibs and irrigation are often left off the loop so softened water isn’t wasted on the lawn.
3. A Water Heater Spot Sized for the Real Choice
Tank and tankless units need very different preparation. A gas tankless heater draws far more gas at full output than a tank, so the gas line must be sized for it from the meter. It also needs proper venting, and condensing models need a condensate drain. A tank installed in the attic, which is common in Texas homes, needs a drain pan piped to the outside. If you want hot water at the faucet faster, a recirculation line is far simpler to add now than after the house is finished.
4. Cleanouts You Can Reach Without Digging
Cleanouts are the access points a plumber uses to run a cable or camera through your drains. They should be at the point where the building drain leaves the house and at key changes in direction. Make sure they won’t end up buried under a flowerbed, paved over by a patio, or hidden behind cabinets. Hill Country homes on septic systems benefit from an accessible exterior cleanout between the house and the tank, because septic backups often start in that stretch of pipe.
5. Supply Lines Kept Out of the Cold Zones
Freezes are rare here, but when they arrive they find every pipe in an unheated attic or on an exterior wall. Walk the framing and note where water lines run. Lines in exterior walls should sit on the warm side of the insulation. Attic runs should be avoided, or well insulated if they can’t be. Frost-free hose bibs cost little more than standard ones and keep the shutoff valve inside the heated wall.
6. Shower Valves Set to the Finished Wall
A shower valve body has to sit at a depth that matches the final wall surface, including backer board, thinset, and tile. Set it too deep and the trim won’t reach; set it too shallow and the trim will stand off the wall. Bring your tile choice to the plumber before the valve is set. At the same time, check wood blocking in the framing for grab bars, a wall-mounted vanity, a floating toilet carrier, or a shower niche that has to avoid the supply lines.
7. A Labeled Manifold and a Photo Record
Many new homes use PEX with a central manifold, where each fixture gets its own line and shutoff. That arrangement only helps if each valve is labeled. Ask for labels before handover. Then photograph every open wall, with a tape measure in the frame for scale. Those photos become a map for hanging shelves, locating a future leak, or planning the next remodel without guesswork.
8. Old Drain Lines Checked Before New Ones Join Them
Remodels add a different risk. A new bathroom is often tied into drain lines that have been under the slab for decades. In older San Antonio neighborhoods, that can mean cast iron that has rusted from the inside or sections that have sagged as the clay soil moved. A camera inspection before the tie-in shows whether the old pipe can carry the new load. It also confirms the drain keeps a steady slope, usually a quarter inch per foot for smaller lines, so waste keeps moving instead of settling.
Checking these eight points takes an hour or two on site, ideally with your plumber and contractor in the same room. It is the last point at which every pipe in the house can be seen, changed, and documented at framing stage prices.
